MY CONTRIBUTION TO COLLABORATION IN THE COURSE

In the last 13 weeks, this course gave me a valuable learning experience, not only on new software but also collaboration skills. At the beginning of this semester, I felt that working as a team was something that I was not quite familiar with, but as the time goes on, I have learnt that the tasks could not be completed without collaborating, sharing knowledge, and helping each other. Although my E-volve team is not the best team in the class, but I think it is the best team for me. We learnt from the strengths and weaknesses of each other, drew the strengths and helped with the others’ weaknesses. I think the important things with working as a team are sharing our opinions and responsibility to our assigned tasks. We also need to be happy of what we are doing.


At the start of our project, we made a list of major tasks that we needed to do. Everyone in our team had the right to choose their own tasks. For me, I was willing to do texturing and importing. I tried my best to do my own tasks even there were some difficulties but I always think that every problem has solution. The importing is one of our major problems. I tested it with various programs, employ the prior knowledge from other courses and combined them into the solution. Our team decided to create the model in Revit and obviously we needed other programs that support exporting to Crysis. Firstly, I used SketchUp; the model was fine in Crysis but I got problem with the texture. It disappeared after reloading. Then, I tried it with 3ds Max, Blender and Maya, but both model and texture did not went well in Crysis. It was quite time-consuming. Consulting with my teammates and other teams gave me good information, every team had common problems but we solved the problems differently. Since SketchUp could export the model perfectly, my team decided to base on SketchUp but we still needed to find out the texture problem. Finally, this problem was solved in week 6. I then shared step by step methods of solution in my blog and also in the Wiki class. I also had a chance to help some of other teams with the texture problem.


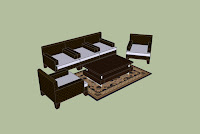
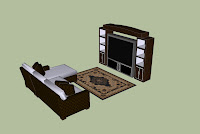
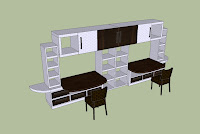
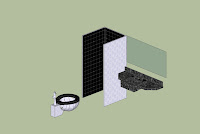
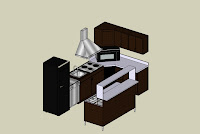
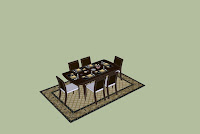
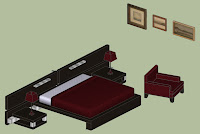
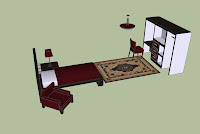
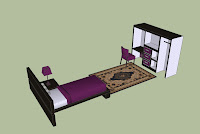
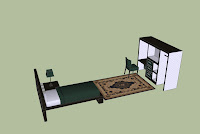
After the hardest part was solved, I then focused on the interior building. All furniture and the interior layout were changed for the final fabrication. The furniture was from Google Warehouse and the materials were applied by me in SketchUp. I found that only some SketchUp models can be converted to .cgf file. So it took a bit of time for me to choose the right one which can be converted to .cgf file and is suitable for the building. For the last fabrication, we were suggested to have some themes for the interior. As the building is a resident house, the texture should have warm feeling and might be lightened up by colour scheme. So I did some research on interior design and asked a team to comment. They gave me some good suggestions, so I changed some texture a little bit. I think not all the tasks is successful at the first time, we need to discuss, listen, give advices to each other.


I have also contributed to other minor tasks such as creating team schedules, updating some weekly journals and wiki, AI, creating one 30 second video and fixing some missing parts of the model in Crysis. I am quite happy of what we have done for our fabrication even there are still some problems. I cannot say that the final work is only my work, or even my team work but I would like to say that it is the work of whole class.


WELL CITY - FINAL FABRICATION


SMART OBJECT


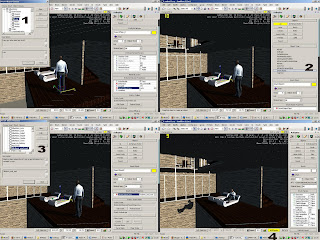
As the submission date is coming up soon, we still have not added any AI yet, at least we need people doing activities inside the building. So, I went to search the video tutorials on Youtube and ask Stephen for assistant about smart objects. He gave me really great help, and here are the steps of making smart object.


1. Place a person near an object

Click on Smart Object Class (under Entity Archetype Properties2) and Select an action for a person (in this case, I choose IdelActions > UserClasses > Lazy)

2. Go to RollupBar > AI > Object Type > and then drag SmartObject to an selected object

3. Select SmartObject point and Choose Smart Object Class as you want (in this case, I choose IdelActions > Sitdown_and_rest)

4 Click AI/Physics button


DOORS

The Crysis doors in our last fabrication were not quite suited the building, as the suggestion from the tutors, so this time, we are planning to import from external source. While Wilson is working on the map and Jackey is testing on how to make interactive door, I am finding the suitable doors from Google Warehouse and preparing to export them. Our team agreed to have white opening doors, without glass in order to make privacy for each room. After we followed tutorials in Wiki, we were still not sure about how to make them interactive. So I tried another way and that is much easier than what we were planning to do. The solution is using existing advanced door in Crysis and changing default colour to white door texture. As the time goes on, I think we have learned so many things and have known a better way to solve each problem.


Different Door Styles from Google Warehouse


White Door Texture

PLACEMENT OF MODEL AND FURNITURE INSIDE CRYSIS


Once I imported the model and all furniture into Crysis, the next steps are doing placement of furniture inside the building, and reassigning material to the objects (.jpg to .dds). The process is not too difficult but quite repeating.


TEXTURING AND GROUPING

Since we got the right scale of building and also some new furniture from Google Warehouse, the next tasks for me are to decide on the placement of furniture and texturing them. To make it easy for exporting, I have scaled the furniture down and grouped them inside SketchUp, according to different spaces of the building. These were quite time-consuming as it contains various steps which I have mentioned before (http://wirada-arch1392.blogspot.com/2009/04/material-solution.html).


Scaling & Texturing & Grouping


TRICKS

The problem from this task was that the SketchUp’s standard colour (e.g. red, gray, black, etc.) did not show up on the model when exporting to Crysis, whereas materials such as stone and wood are fine. So I have played around with the setting in SketchUp, and discovered a useful trick.


Exporting a Model with SketchUp’s COLOUR materials

1. Create white texture – Power of 2 (e.g. 64 x 64, 128 x 128, 512 x 512, etc.)

2. Chose any colours in SketchUp and apply to the model

3. Go to “In Model” (It will show any texture applied on the model)

4. Double click on material or click on Create Material… button

On the Edit tab, adjust the colour by choosing an appropriate picker and texture size as you want

***As you can see, there is no .jpg file on texture image section.

5. Click Browse and find white texture (White texture will appear on the model.)

6. Redo the colour setting again (or type the HSL number again)

7. After exporting the model, the colour should appear on the image folder.


BUILDING TEXTURE

On Friday June 12, we had a group meeting. This was a chance for me to give my team comment on the building’s texture. Wilson and Jackie suggested me to use stone both exterior and interior and change the stone texture because the old one was quite blurry. I also agree with that. So today, Wison helped me to find out the right stone texture in SketchUp’s materials. He also learned how to import textured models into Crysis. I suggested him to use my blog as a guideline and helped him with any problem. As a team, I think it is a good thing to learn others’ work so we can help each other or at least we know the basic methods which might be useful in the future.


Left: The Old Texture

Right: The New Texture

Below: Stone Setting


SCALING THE MODEL

Since there is the limitation of scaling inside the Crysis, I decided to make the right scale in SktechUp. I have tested the scale inside Crysis for nearly ten times. The method I used was to compare the height of door with the person inside Crysis game. Amazingly, the final scale of the building is only 12 mm in SketchUp


10594 mm when importing from Revit to SketchUp___The final Scale of the building, 12 mm in Sketchup


IMPORTING THE MODEL AND FIXING THE PROBLEMS

Once Wilson completed remodeling the building, I then imported to SketchUp and tested the model in Crysis. The scale of the building in Crysis was very large and some parts of building were missing. If we see the building from the outside, the model seemed to be perfect, but once we go inside, some walls, floor and ceiling disappear. I tested importing only the problem parts and that was fine. I was not quite sure why it happens. So I fixed this problem by deleting the problem parts in SketchUp, reimported only those parts from Revit, and tested again in Crysis. I needed to delete them before replacing, otherwise it will get flashing. Once one part is fixed, new problems always occur. I needed to redo and test it many times. I found that dealing with various software is not an easy task but I have tried my best and finally we get the perfect form of building.


Too large scale of building inside Crysis


Walls and Ceiling problems


Testing single part inside Crysis


Deleting the problem parts in SketchUp


Reimporting the problem parts