During the week, I have been searching for information about the method of importing materials to the Crysis. I found many useful video tutorials from WonderHowTo website. The video tutorials guide us step by step through the process of exporting from 3ds max into the game Crysis. However, they are quite long, so I decided to take some notes and capture images. I hope that this website would be helpful, not only for my team but for all people who are interested in.
Part01 - Exporting object from 3ds Max into the game Crysis - Material
http://www.veoh.com/browse/videos/category/technology/watch/v6370336wb5dAxab
1. Go to Material Editor > Click Standard > Select Standard to Multi/Sub-Object
2. In Multi/Sub Object Basic Parameters
- Set Number of Materials
- Change the name of mass material
** It must be the same name as the object that is imported.
- Change ID and name
3. For each material > In the Standard Basic Parameters
- Shader – Cytek Shader
- Tick Phyicalise – choose Default
- Default – Anything can collide with the object.
- Physical Proxy – allow to set the object on the ground
4. Creating Map
- Tick Diffuse colour > Click None
- In Select Bitmap Image File window, double click on Bitmap and then select material
- In the Material Editor window, assign the material (3rd tool) and turn it on (9th tool)
And then repeat the processes for other parts of model…
5. Open Editable Poly (On the right hand side)
- Select Polygon
- Select the model 0r Ctrl+A (red) – Press F2 key to turn off the red
- Change material ID and name that is associated with the object you are working on
Tips
- Right click to hide selected object à easily apply to other parts of object
- Right click and select Clone to clone the model
- Change Diffuse Colour, Transparency, Opacity, etc.
____________________________________________________________________________

- In left view mode > highlight entire the model >> Click Measure
*Have a look a Dimensions (The actual size of the model will be ten times from it should be, so scale down the model before exporting.)
- Group the object (Group > Group) and then scale it
- Change Absolute World to 0 (for x, y, and z)
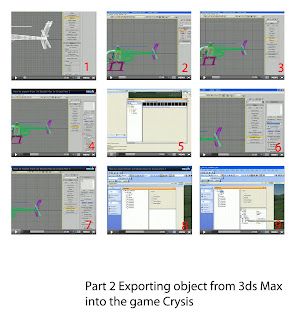
2. Set up Dummy (Image02)
- In Object Type (Left window), Click Dummy
- Place the Dummy at the origin 0, 0
- Modify its name
- Go to Top view and move the object to the center
- Go to the H Key and select the Dummy
3. Reset XForm for all parts of the object (Image03)
* does not seem to work on multiple object
- Go to Utilities tab
- Select Reset XForm
- Click on each part of object
- Click Reset Selected
- Select the entire object (except the dummy)
- Right click > Convert To > Convert to Editable Poly
4. Exporting to the Crysis (Image04)
- Select Dummy
- Go to Utility tab
- Click CryEngine2 Export
Firstly, export the material…
- Pull the roller bar down > Click on Create Material
It will bring up Sandbox Editor and ask for material (Image05)
Secondly, export various part of the model…
- In Object Export tab, Select a choice for Export To.. (e.g. Animated Geometry) (06) > Click on Custom File Name
- Select parts/all of object and link them to the dummy
Ctrl+L to seclect the whole object
*Check - Select Dummy (Origin) and Press H Key à Select Form Scene
- In Object Export tab (Left window) > Add Selected (Image07)
Every part that link to the dummy will be exported.
- Click on Export Modes (Left)
General error messages will pop up, ignore it.
- In Object tab, click create Entity
The object is still not in the Browser.
- Go to View > Open View Plan and Select Editor or others
- In the Editor window > Click Open Selected > and Save As…(Image08)
- Close and Open Sandbox Editor again
- The object should be in the Browser (Entity > Browser)
- Go to Editor > Open Selected > Body > open File Name (game/bin/object/..object name..) > Select .cga file > save (Image09)
Tip
- Create Object Folder
- Every name must be the same, e.g. car.max, car.mtl, car.cga
